Orders Management Redesign
Last updated: June 10, 2026
Overview
The Orders Management Table in Tonomo has been redesigned to make finding orders easier and give users more flexibility over the data they see. Here's what's new:
What's New
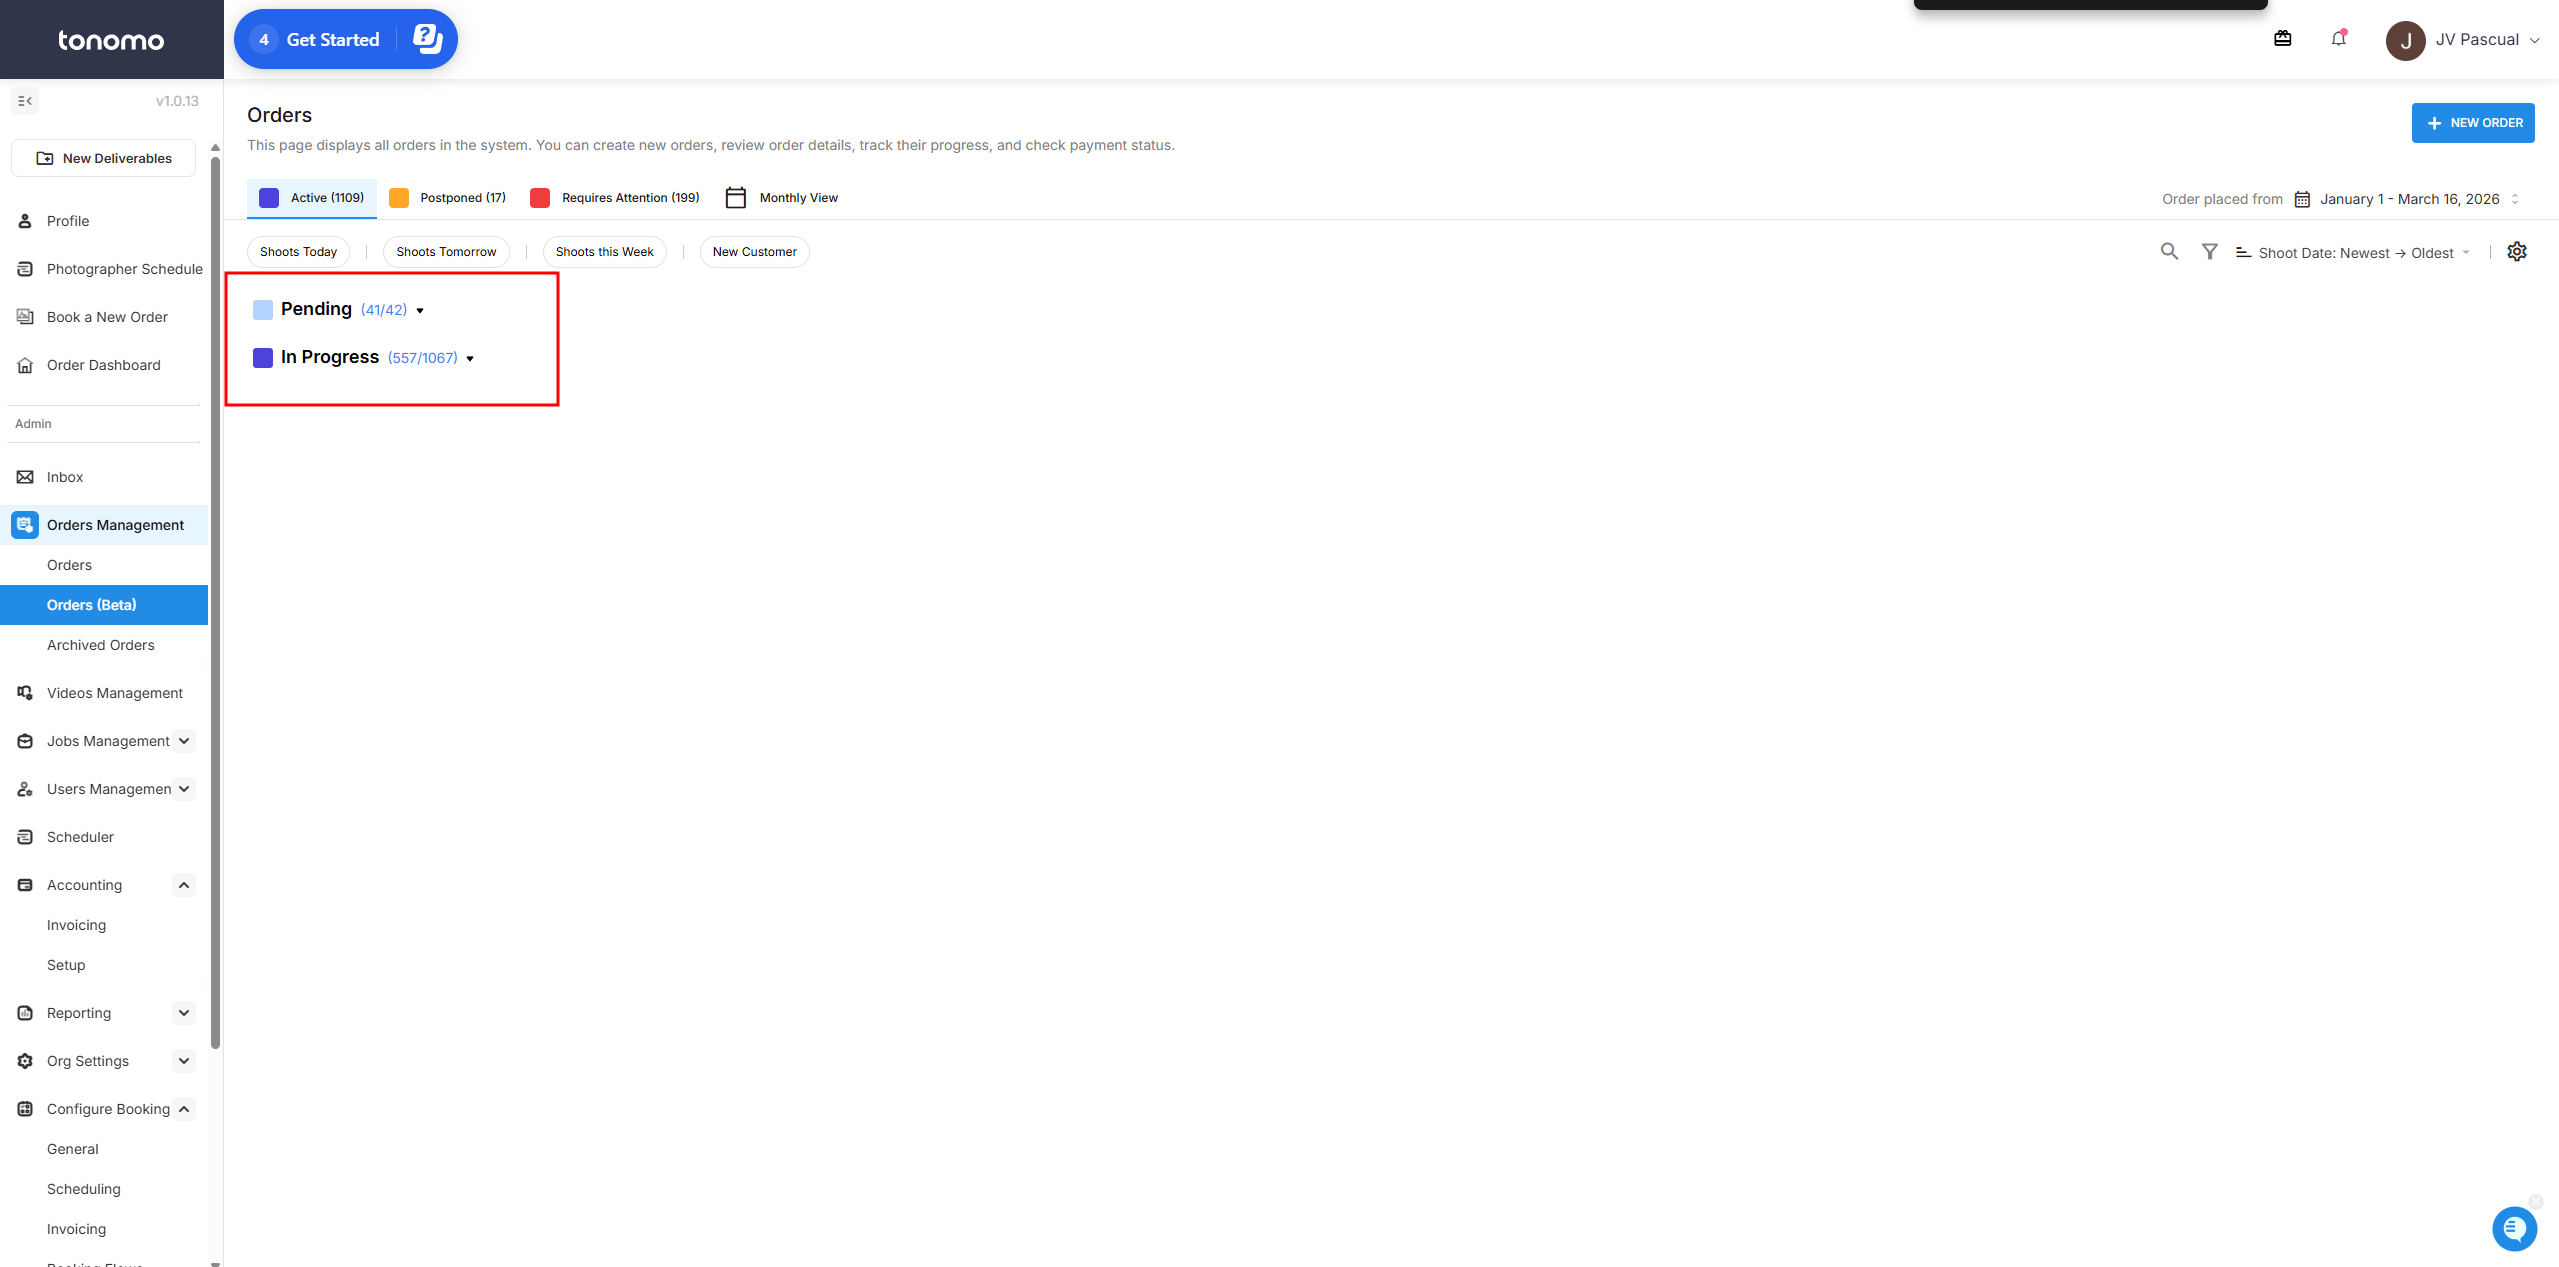
No More Pagination — All orders now load at once, meaning filters and search apply across your entire order history, no more clicking through pages.
Advanced Filtering — Filter by any combination of customer name, service, payment status, shoot date, and more, all in a single search.
Customizable Columns — Choose which columns to display and rearrange them to suit your workflow.
Focused Views — Dedicated views for Active, Postponed, and Requires Attention orders, plus a Monthly View for a chronological perspective.
Quick Filters - Instantly surface orders being shot today, tomorrow, or this week.
Order Status View
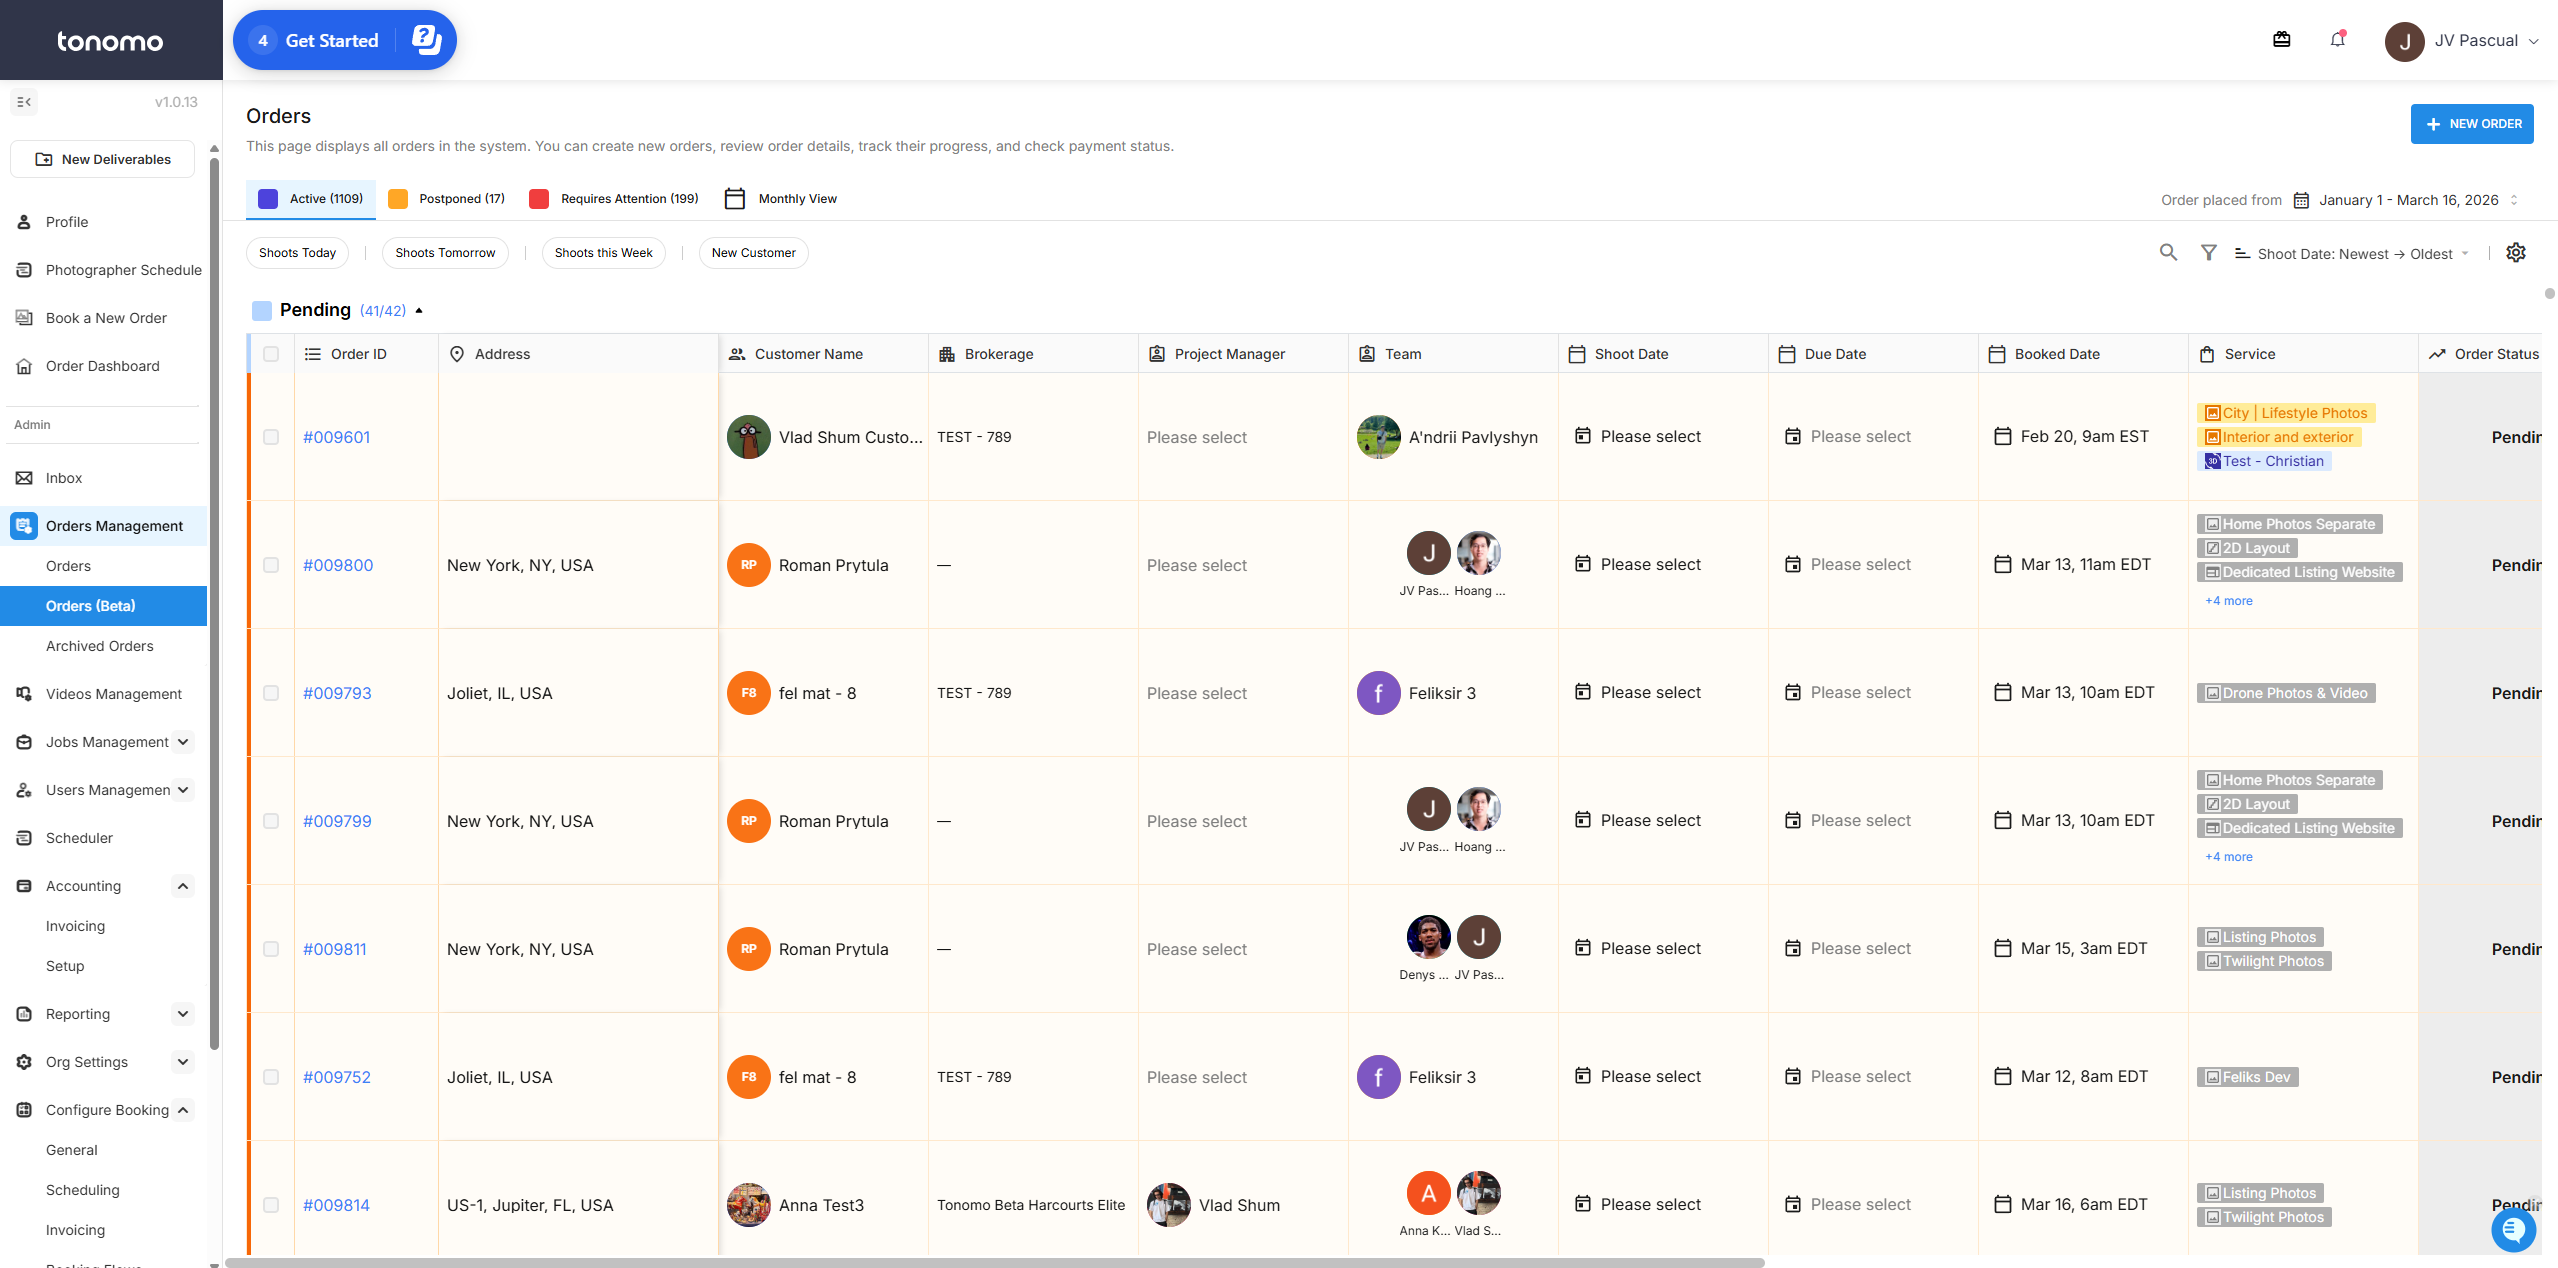
This section provides different view filters, including Active Orders, Postponed, Requires Attention Flags, and Monthly View. Unlike the old design, which had a maximum display limit of 500 orders, the new design removes this restriction. Additionally, the new design includes the ability to filter by day and by new customers.
Primary Filter
Active — Displays only active orders, such as those with a Pending or In Progress status.
Postponed — Displays only postponed orders. This is especially helpful when an admin needs to reschedule a postponed order.
Requires Attention — Displays orders that require attention, including all unscheduled and escalated orders.
Monthly View — Displays orders by month for the current year.
Secondary Filter
Shoots Today — Displays only orders scheduled for today.
Shoots Tomorrow — Displays only orders scheduled for tomorrow.
Shoots This Week — Displays only orders scheduled for the current week.
New Customer — Displays only orders from new customers. When a new customer books an order, the system automatically flags it and adds a New tag beside their name.
Date and Other Filters
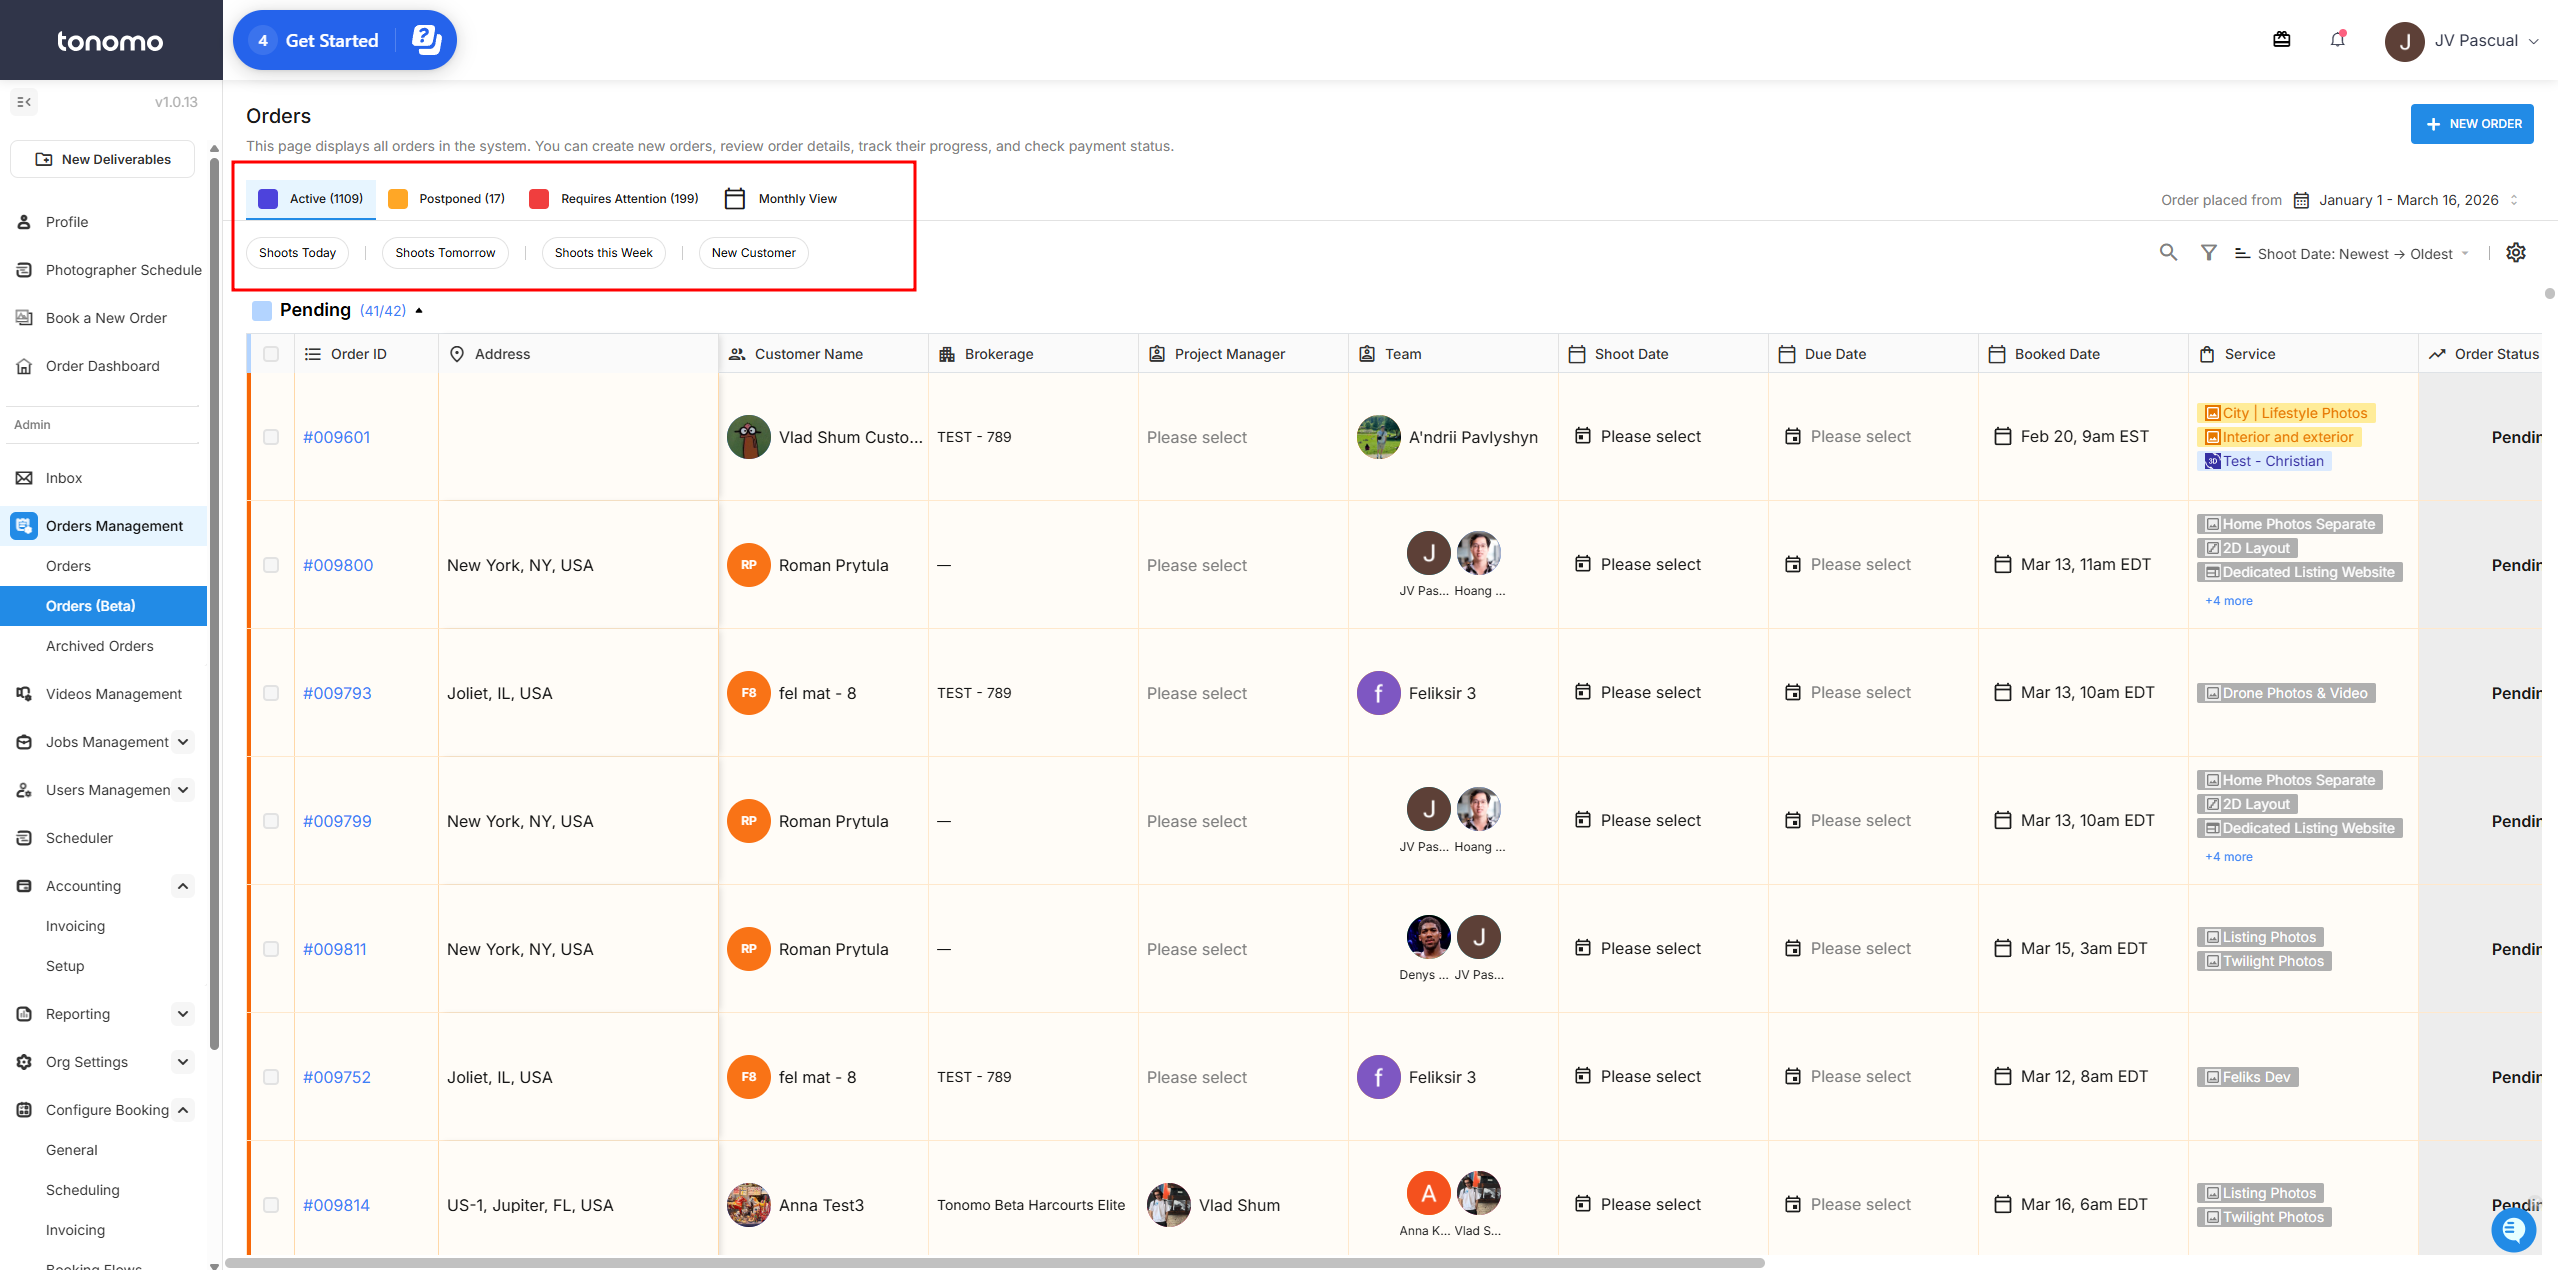
This area includes the + New Order button, date range filter, search, filter, sort by date, and column settings to help admins manage and customize the orders view.
+ New Order — Used by admins to manually create a new order, overriding any booking limitations set on the portal.
Date Range Filter — Allows admins to filter orders within a specified date range.
Search — Allows admins to search for a specific order by address, customer name, service, and more.
Filter — Allows admins to apply specific filters to the orders page. Available filters include:
Customer Name
Shoot Date
Due Date
Service
Team
Project Manager
Order Status
Payment Status
Sort by Date — Allows admins to sort orders by a specific date type. Available options include:
Shoot Date: Oldest to Newest — Sorts orders from oldest to newest based on the shoot date.
Shoot Date: Newest to Oldest — Sorts orders from newest to oldest based on the shoot date.
Due Date: Oldest to Newest — Sorts orders from oldest to newest based on the due date.
Due Date: Newest to Oldest — Sorts orders from newest to oldest based on the due date.
Booked Date: Oldest to Newest — Sorts orders from oldest to newest based on when the order was placed.
Booked Date: Newest to Oldest — Sorts orders from newest to oldest based on when the order was placed.
Order Management Settings — Used for two main purposes:
Show Columns — Allows admins to select which columns are visible or hidden. This is especially helpful for mobile users who want to display only the most important details.
Column Order — Allows admins to rearrange the displayed columns on the Orders Management page.
Main Section
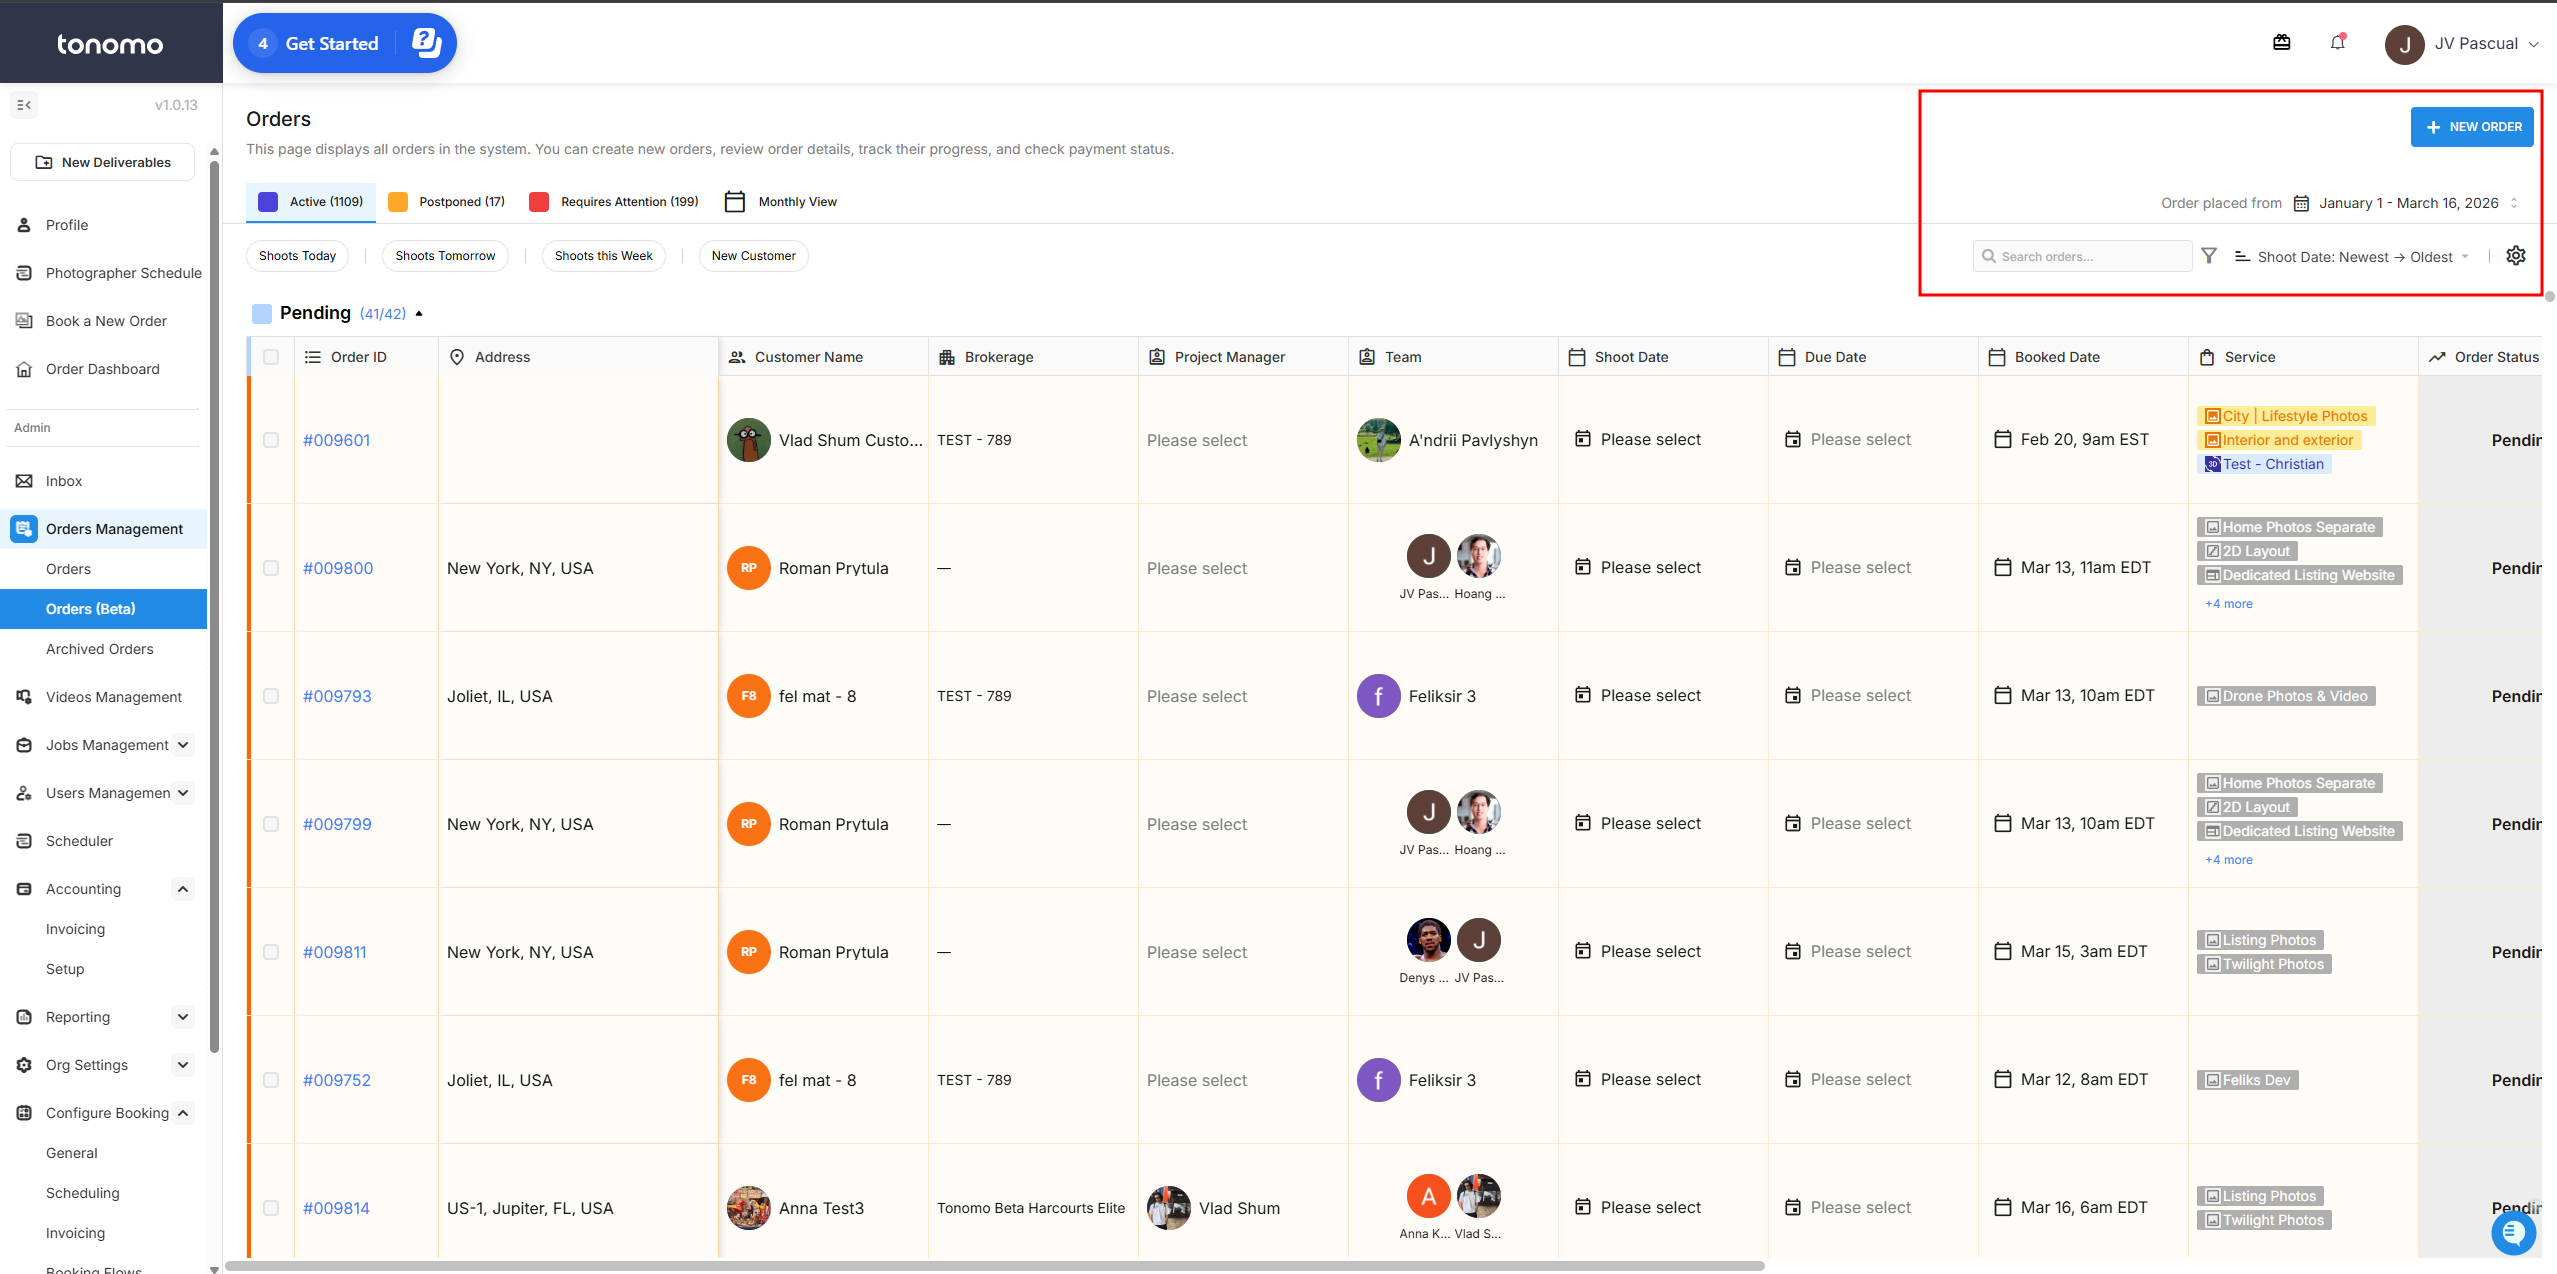
This section displays the primary order status. Admins can expand or collapse the group by clicking the arrow on the right side.
Order ID — Displays the unique order ID. Clicking on it will open the Order Details section on the right side.
Address — Displays the order's address.
Customer Name — Displays the customer's name. Clicking on it will reveal the customer's phone number and email.
Brokerage — Displays the brokerage the customer belongs to.
Project Manager — Allows admins to assign a project manager to the order for monitoring purposes.
Team — Displays the assigned team members, such as photographers.
Shoot Date — Displays the scheduled shoot date. Clicking on it will open the Order Details section, where the shoot date can be updated if needed.
Due Date — Allows admins to assign a due date to the order, helping team members prioritize orders accordingly.
Booked Date — Displays when the order was booked.
Service — Displays the services included in the order. Clicking on it will redirect the admin to the Project Chat page.
Order Status — Displays the current order status. Admins can also directly update the order status from this column.
Payment Status — Displays the current payment status. Admins can also directly update the payment status from this column.
Amount — Displays the total amount of the order.
Customer Order Link — Displays a link to the order status page. Clicking on it will open the page in a new tab.
Dropbox Folder — Displays the final Dropbox folder link for easy access to upload or remove files.
Property Website — Displays the property website link once it is enabled. This is a quick way to verify whether the listing website is active for the order.